Some instructors have found it useful to utilize Google Forms in order to collect information from their students. For example, instructors can set up a Google Form to get to know the background and/or interests of their students and then export the collected data into a spreadsheet that can be referenced in class. The use of Google Forms expedites the traditional process of students handwriting answers onto a handout and having the Instructor or FSU transfer the data into a separate spreadsheet.
1. Find & Create a Google Form
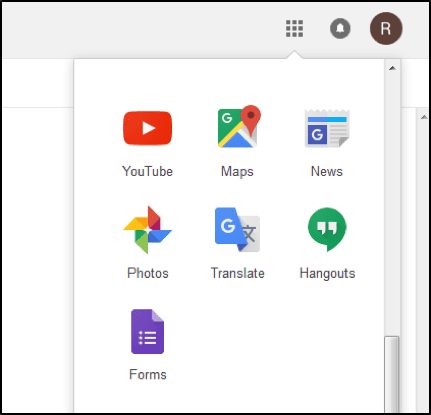
1a. When you are signed-in to your Berkeley Google account (e.g. bMail, bCal), navigate to the menu of Google Apps at the top-right corner of screen.
1b. Click ![]()
1c. Select “Forms” (see below)
1d. You may select one of the pre-designed theme templates, or you can select “Blank” to create your own
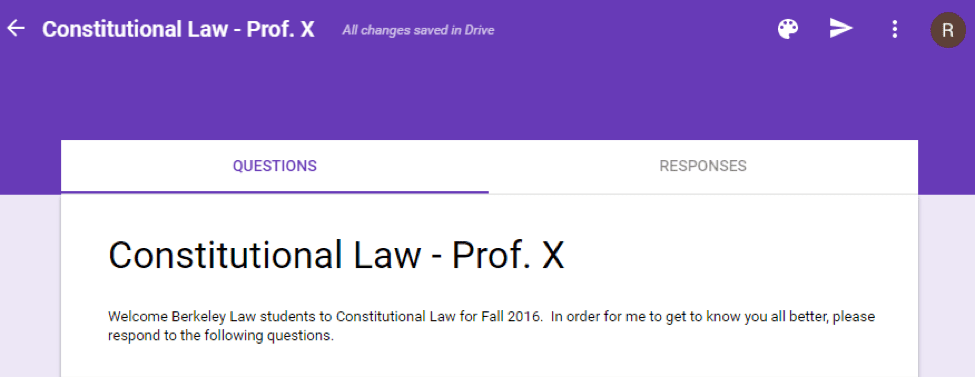
2. Title Your Form
To give a title to your form, click where it says “Untitled form” and type the name you want to give to the form. You can also type in a description or short message that you would like participants to see just below the Title (see below)
3. Add Questions
To add a Question, click the ![]() icon and type your question directly into the “Question” field.
icon and type your question directly into the “Question” field.
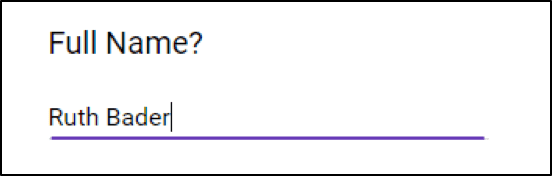
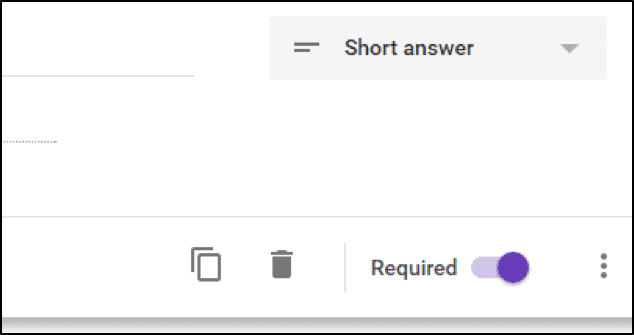
“Short Answer & Paragraph” question types are the most common, and participants type in free-text for their answer (see below)
You can choose whether to make a specific Question required or non-required

Check here to see additional information on other type of answers and advanced settings.
4. Change your Settings
Click the “Settings” icon ![]()
General
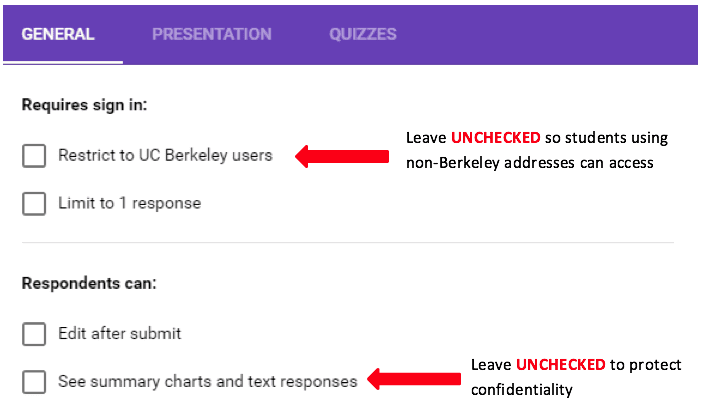
IMPORTANT NOTE: In order to protect confidential information of students, make sure that “See summary charts and text responses” is NOT CHECKED
5. Edit Collaborators
5a. Go to “More” options under the ![]() icon and select “Add Collaborators”
icon and select “Add Collaborators”
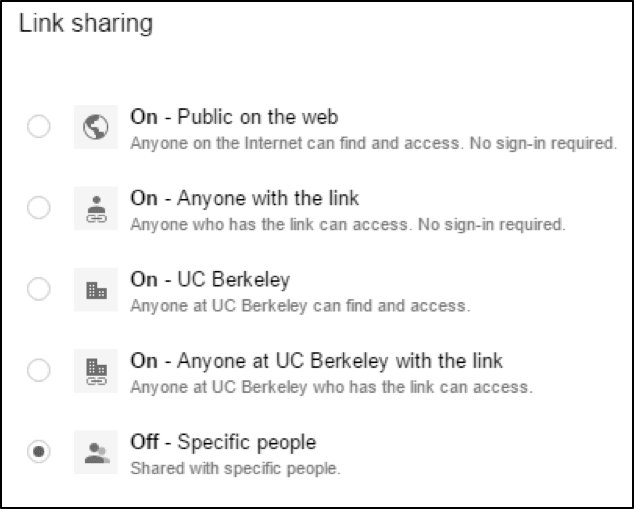
5b. Make sure that “Private – Only you can access” is shown (see below). Students will still be able to access and complete the form, but “Private – Only you can access” prevents respondents from changing the setup of the form.

If “Private – Only you can access” is not shown, click “Change” and select “Off – Specific People” (see below)
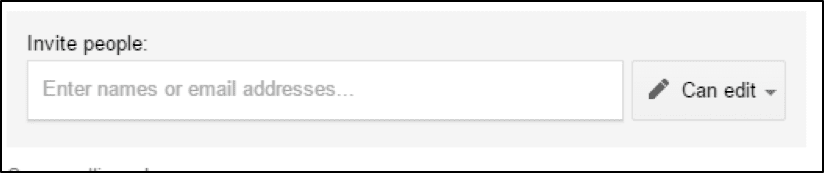
5c. To allow a fellow Instructor or FSU to edit the form, enter their email address and select that they “Can edit” (see below)
6. Sharing the Link to your Participants
Click the “SEND” icon 
6a. You can send directly via email under the ![]() icon
icon
6b. You can copy/paste a link with your class under the ![]() icon
icon
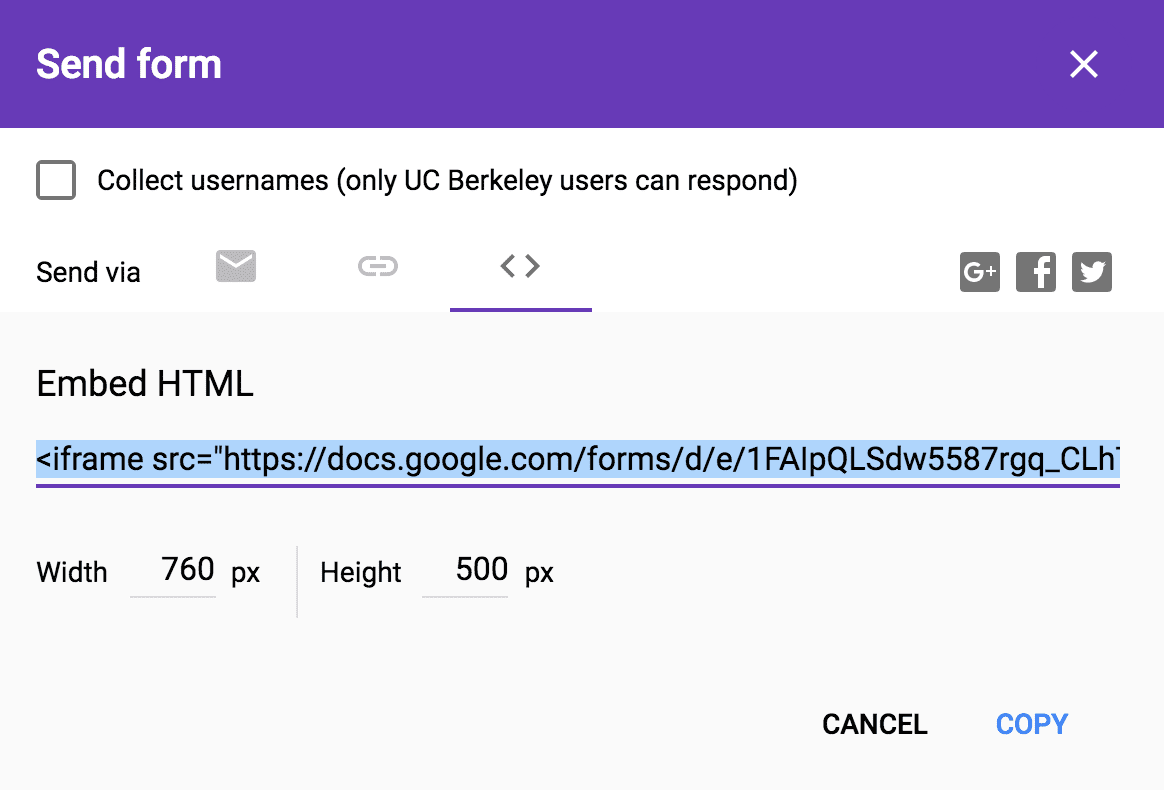
6c. Lastly, you can embed your form in a webpage using the![]() icon. Click here for detailed instructions.
icon. Click here for detailed instructions.
7. Collect Responses
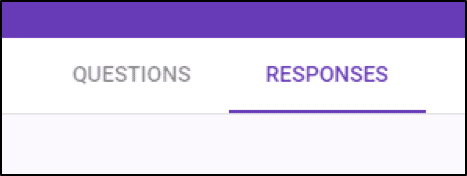
7a. Click the “Responses” tab at the top (see below)
7b. Click the “Create Spreadsheet” icon ![]() to export the response data into an Excel form.
to export the response data into an Excel form.
8 . Types of answers
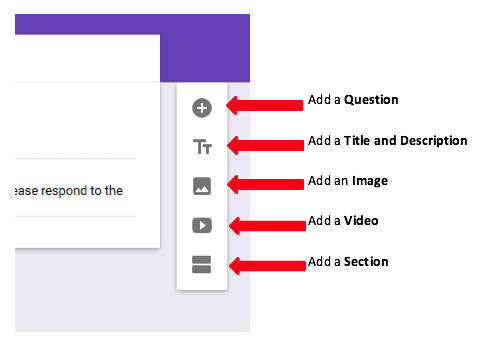
You will see a vertical toolbar with options of how to organize and personalize your form. You can insert different Sections and Titles to vary the hierarchy of Questions in your form:
To add a Question, click the ![]() icon and type your question directly into the “Question” field.
icon and type your question directly into the “Question” field.
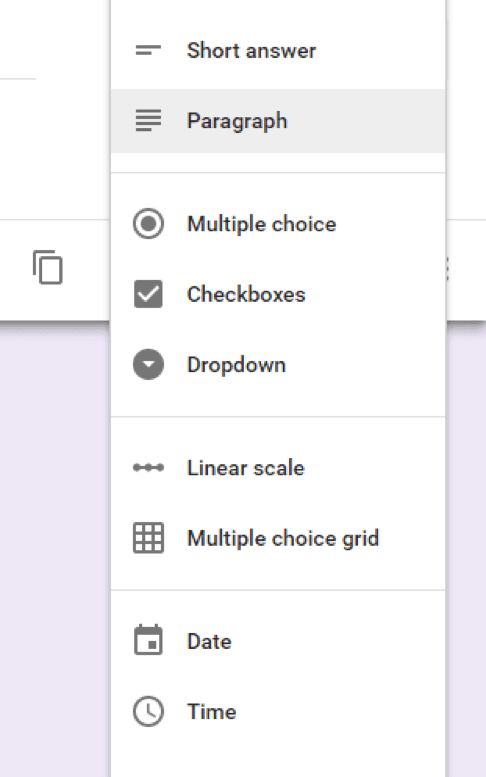
There are several Answer Types that you can choose for how your participants will answer each question. You can choose the Answer Type for each question from a drop down menu (see below)
8a. Short Answer & Paragraph: participants type in free-text for their answer (see below)

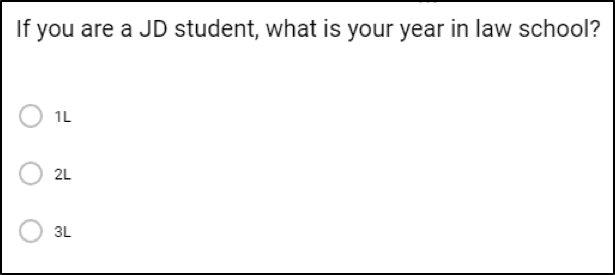
8b. Multiple Choice: you provide answer choices for your participants to select one option (see below)
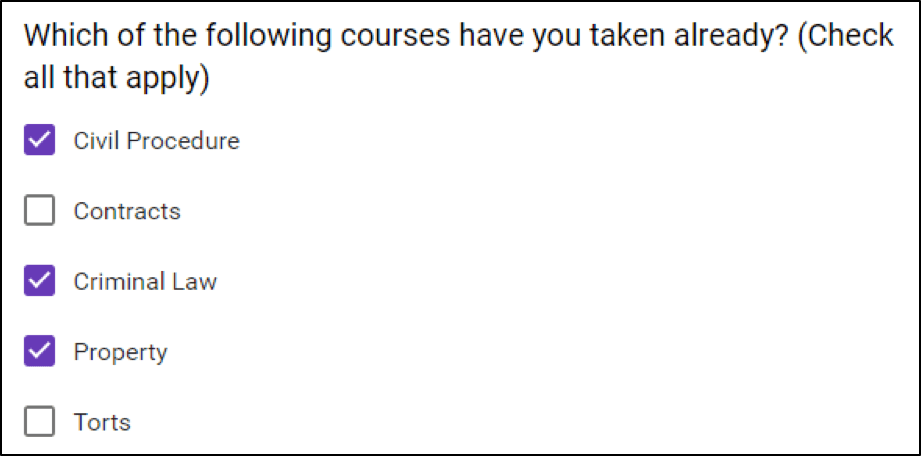
8c. Checkboxes: you provide answer choices for your participants to select all that apply (see below)
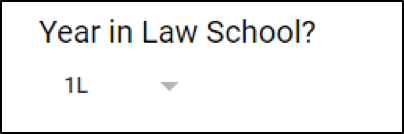
8d. Dropdown: you provide answer choices for your participants to select one option (see below)
8e. Linear Scale: participants are allowed to select an option along a linear range

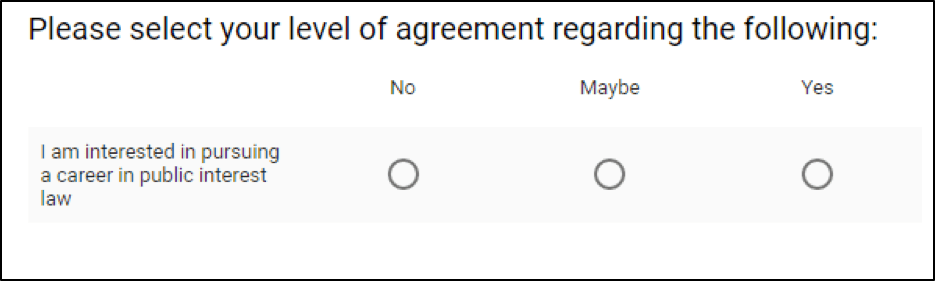
8f. Multiple Choice Grid: participants select given options from a matrix selection (see below)
8g. Date & Time: participants select a particular date or time (see below)

You can choose whether to make a specific Question required or non-required
9. Customize your Google Form
You can change the color theme of your Google Form, select from a host of provided image themes, or upload your own image by clicking the “Color Palette” icon ![]() at the top
at the top
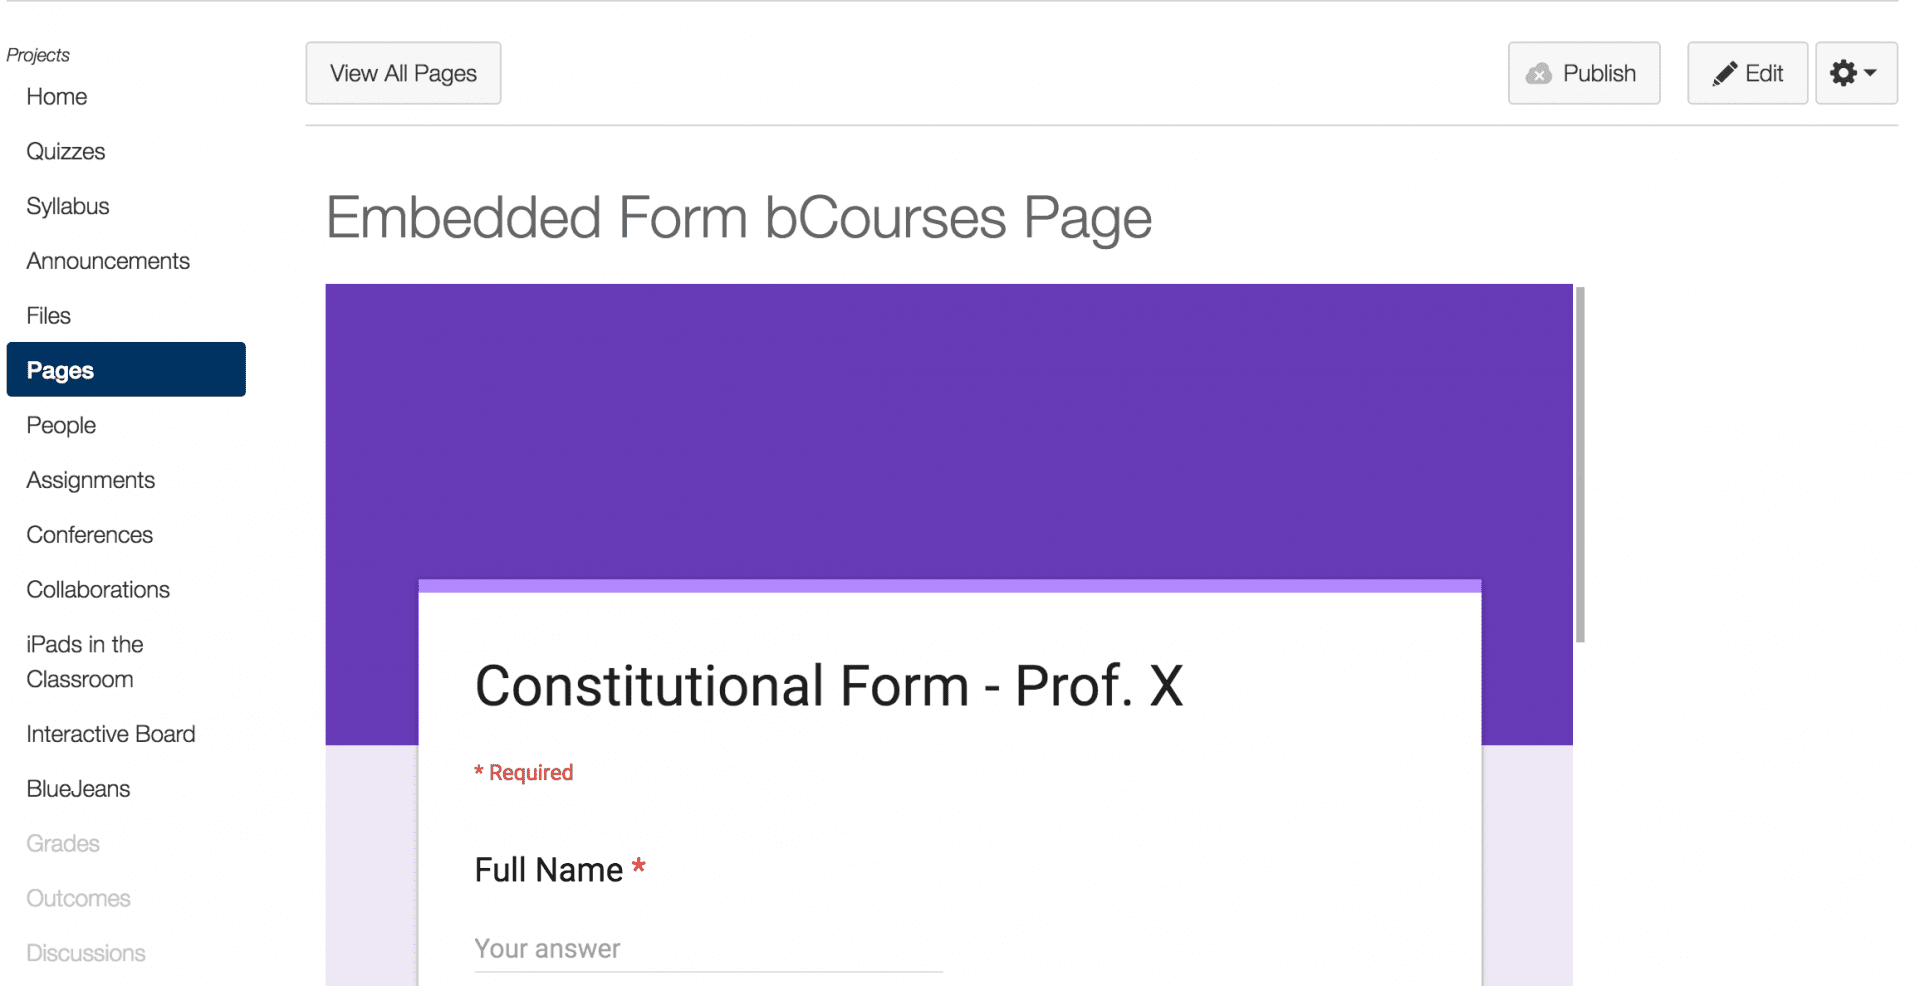
10. Embedding your poll in a webpage
To insert your form in a webpage or a bCourses site you need to copy and paste the code for your form onto the webpage or bCourses site.
10a. On your form, click on ![]() and select on the embed icon
and select on the embed icon ![]()
10b. Copy the HTML code
10c. Go to your bCourses page or WordPress page where you want to embed your form and edit the page
10d. Locate the HMTL editor (bCourses) or Text Editor (WordPress) where to place the code for your form
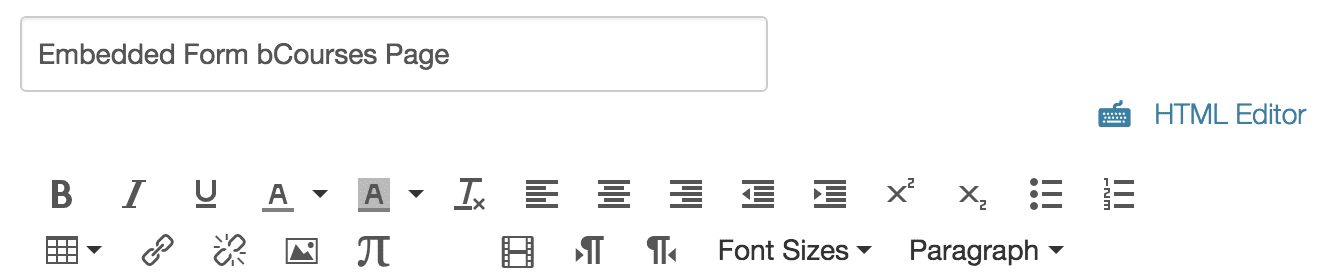
10e. Copy the code and save your page

10f. Check your page to make sure it looks good
Please contact us to schedule a training or ask any questions.
Go to top.